Minecraft: How to Build an Aquarium and its uses
Follow this step-by-step guide to learn how to build an aquarium in Minecraft.

Image via VexelVille
In the huge and endless world of Minecraft, aquariums are attractive features for players’ homes. These captivating structures give players an interesting view of the underwater world. They provide a safe place for many different types of water animals, which can make a house more lively and beautiful.
In Minecraft, you can create an aquarium in different shapes and sizes, allowing players to customize the design according to their preferences and the available space. You can make a small and cozy tank for one fish or a large underwater world that resembles the vastness of the ocean. There are endless possibilities for players to explore and choose from.
Related: Top 5 adult mods in Minecraft
How to Build a Beautiful Aquarium in Minecraft

Here is a step-by-step guide on how to build an aquarium in Minecraft, with detailed material lists and instructions:
Materials List + Block Count:
- Gray Concrete: 8
- White Concrete: 138
- Stripped Spruce Log: 9
- Gravel: 7
- Sea Lantern: 10
- Sand: 14
- Glass: 18
- Water Bucket: 28
- Tube Coral Block: 30
- Seagrass: 7
- Bone Meal: 2
- Kelp: 8
- Brain Coral: 4
- Brain Coral Fan: 4
- Bucket of Tropical Fish: 2
- Bucket of Cod: 2
- Bucket of Pufferfish: 2
Step 1: Building the Frame
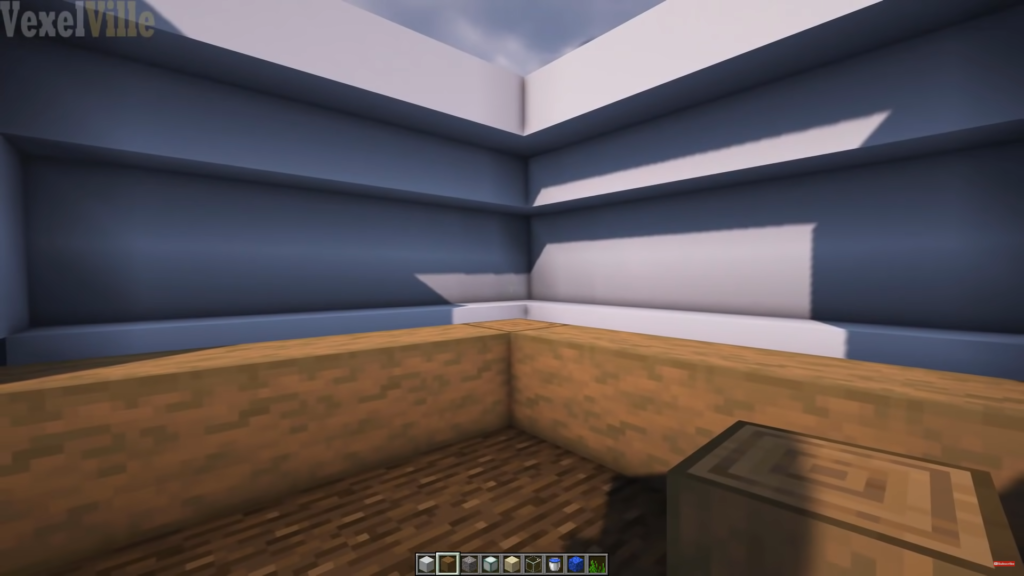
Start by building the structure of the fish tank. Use Gray Concrete Blocks for the bottom part and White Concrete Blocks for the sides. Make the sides five blocks high, and finish the structure by placing five blocks of stripped spruce wood in the front.
Step 2: Adding Decorative Elements
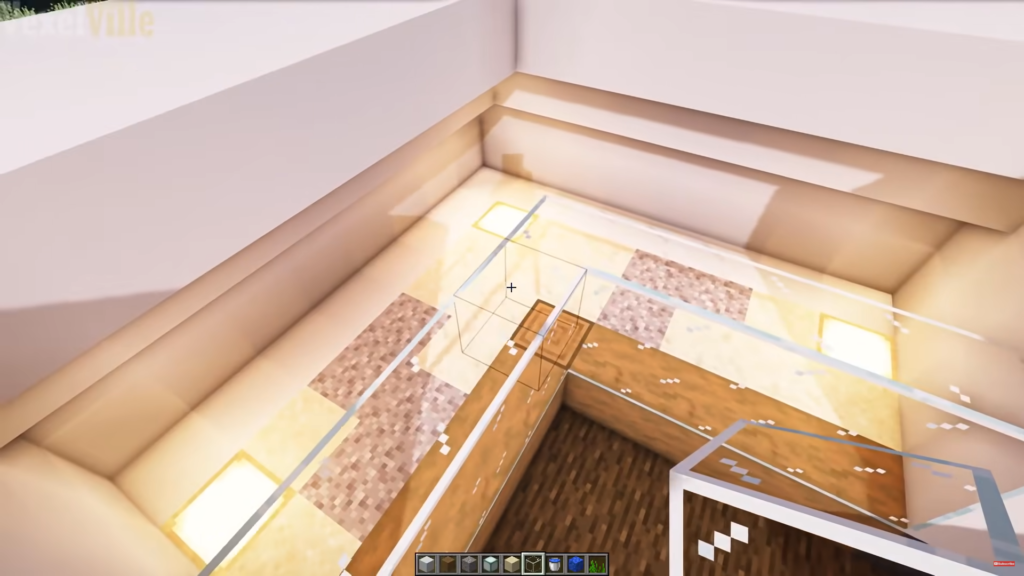
Now add gravel, sand, sea lanterns, and glass to enhance the aesthetics of your aquarium. Place three Sea Lanterns in each corner between the white concrete walls and the Stripped Spruce Log frame. Scatter 7 Gravel blocks and fill the remaining gaps with Sand blocks. For a clear view, stack two Glass blocks on top of each other on every Stripped Spruce Log block.
Step 3: Filling with Water
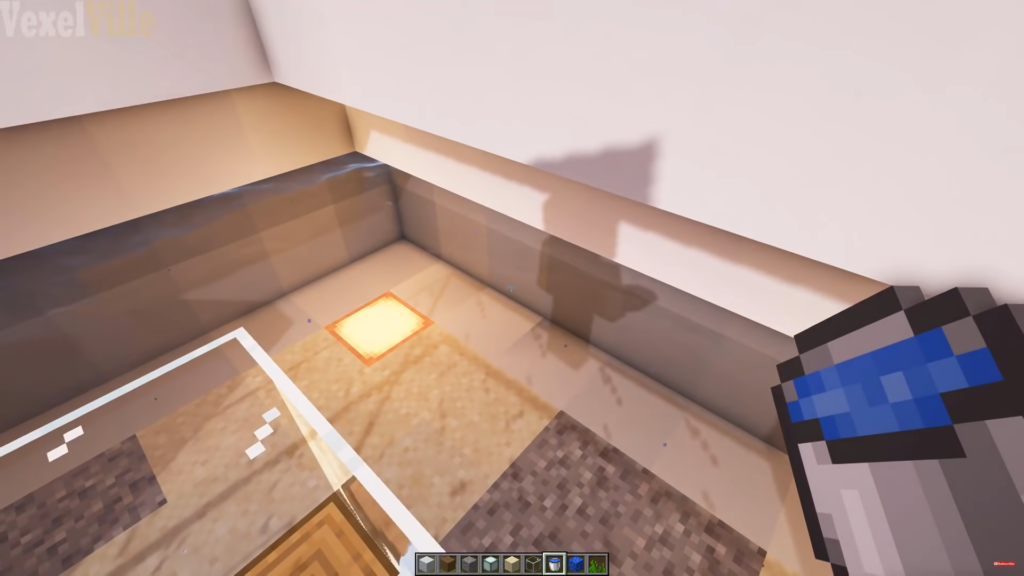
To make the aquarium look real, add water to the tank. Fill it up and make sure the water is even to create a calm and peaceful environment.
Step 4: Creating a Beautiful Background

To make your aquarium look more attractive, add Tube Coral Blocks. These blocks will act as a beautiful blue wall in the background, creating a mesmerizing effect.
Step 5: Decorating the Interior
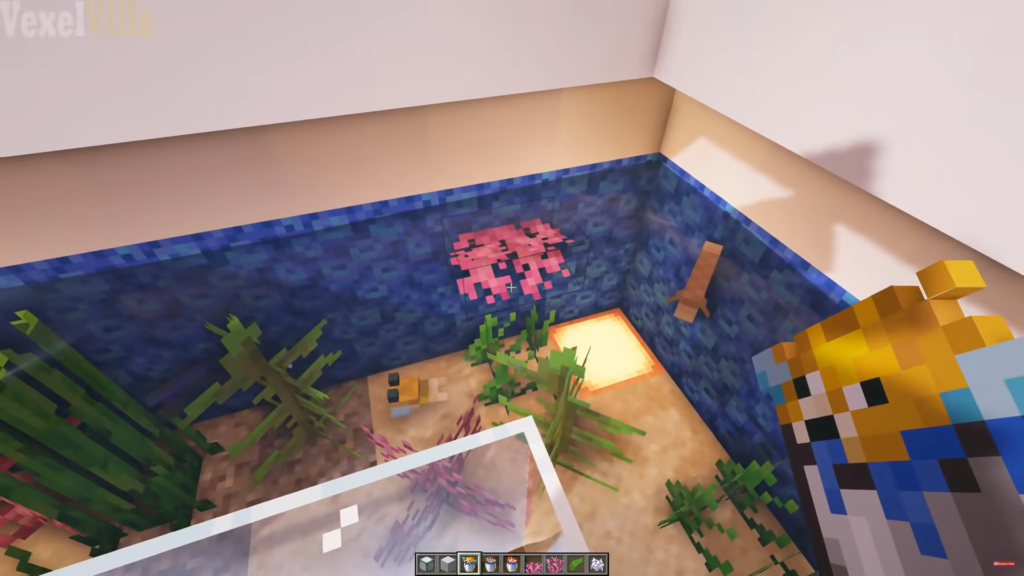
To make the inside of the aquarium look like a natural home for marine life, place 7 blocks of Seagrass. For some height variety, make 2 of the Seagrass blocks taller by using Bonemeal. Add 8 blocks of Kelp to the tank, making 4 tall Kelp plants. To make it even more beautiful, put 4 Brain Coral Blocks and 2 Brain Coral Fan Blocks wherever you like. Finally, put 2 tropical fish, 2 codfish, and 2 pufferfish into the aquarium to make the underwater scene come alive.
Step 6: Finishing Touches
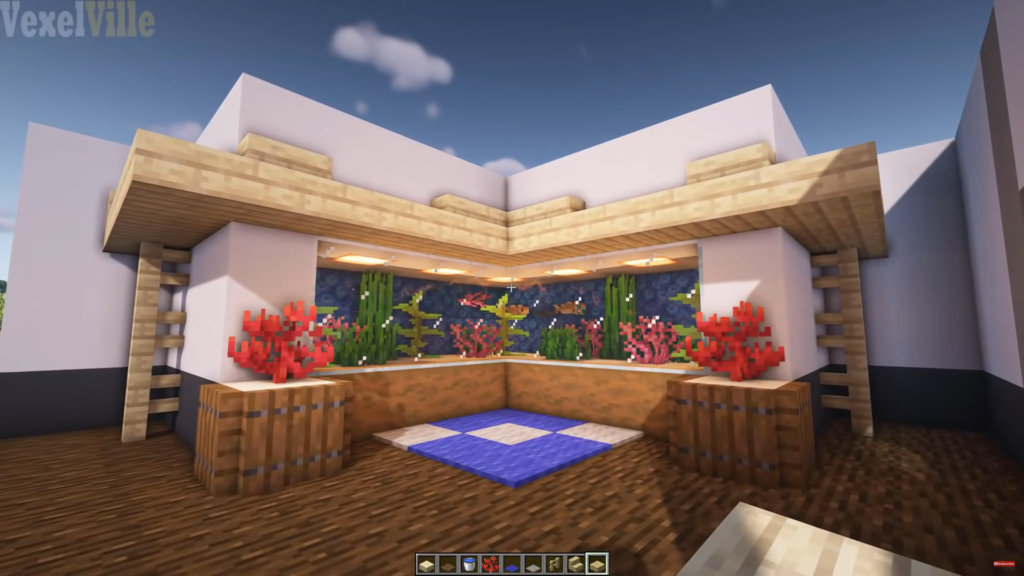
Keep constructing the tank by adding more White Concrete Blocks and Sea lanterns for light. Seal the top of the tank using more white concrete blocks. To make sure there’s enough light, put five Sea Lanterns inside the wall right above the aquarium. This way, the light will shine directly on the tank. To decorate it further, think about using Fire Coral, Colorful Carpets, Flower Pots, Red and Orange Tulips, Oak Leaves, and Paintings to decorate the outside of the aquarium.
To sum up, making an aquarium in Minecraft is easy. It allows you to use your imagination and be creative. By carefully following the step-by-step instructions and using the materials provided, you can build a beautiful aquarium with decorated insides and fascinating water animals.
In case you missed it:
- Top 10 most followed streamers and YouTubers on Twitter’s rival, Threads
- “He should’ve listened to his mom” Popular streamer ohnePixel losses over $100,000 during $130k CS: GO crates opening stream, fans react


