Best Deadlock GravNet and Barrier Mesh Lineups on Ascent Map in Valorant
Here are the Best Deadlock GravNet and Barrier Mesh Lineups on Ascent.
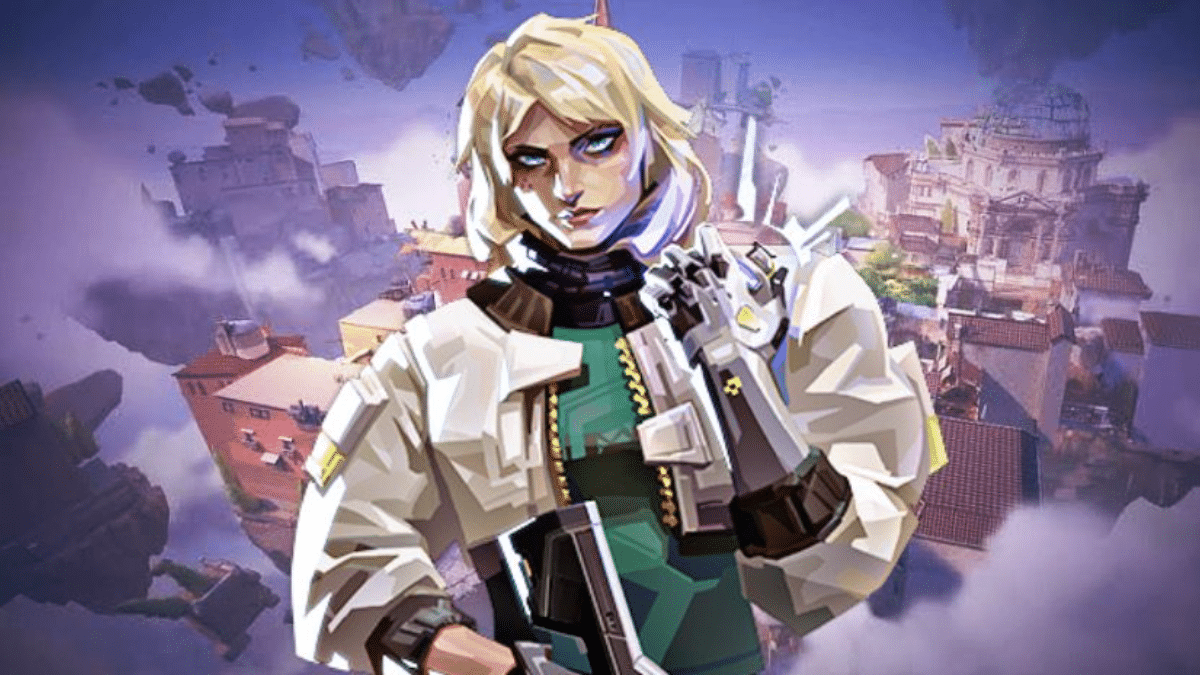
Deadlock is the latest addition to the Sentinels class in Valorant. With her strong presence, she effectively stops enemy movements and controls the flow of combat. Using special abilities with nanowires, Deadlock can secure important positions and retake areas that have been lost. Deadlock’s flexibility and disruptive abilities make her a valuable asset, introducing new tactics to the evolving game. Deadlock’s kit especially excels on the Ascent map in Valorant.
Deadlock‘s GravNet grenade slows down and stops enemies, making them crouch and move slowly. This ability disrupts their movements and gives her team an advantage. Additionally, her Barrier Mesh creates physical barriers that block the opposing foes, giving important stalling time and strategic benefit. Deadlock’s GravNet and Barrier Mesh abilities give her unmatched control over the battlefield, making her a highly valuable asset in any fight.
Related: What is Deadlock’s Sonic Sensor Bug in Valorant? Should players use it?
Deadlock’s GravNet Lineups for Attack on Ascent in Valorant
1. From A lobby to A Main
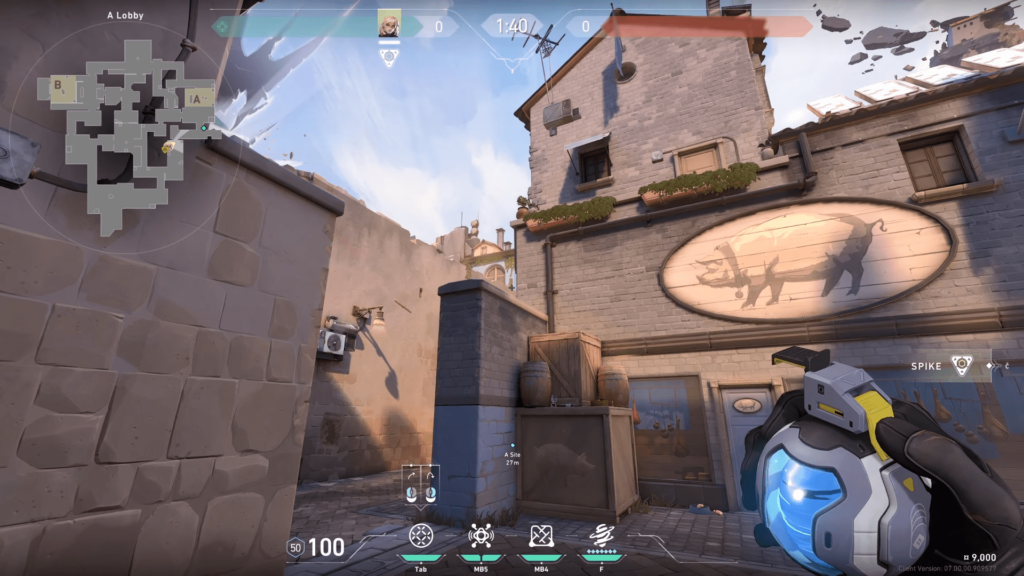
To take control of “A main” area, go near the boxes in “A lobby.” Look towards the front wall and aim at the top as shown in the picture. Then, make a simple throw by clicking the left mouse button. This will make the GravNet land at the entrance of “A site,” where it can catch any opponents who are peeking or hiding there. Since they are crouching and can’t find cover fast, they will have to fight you.
2. From A lobby to Generator
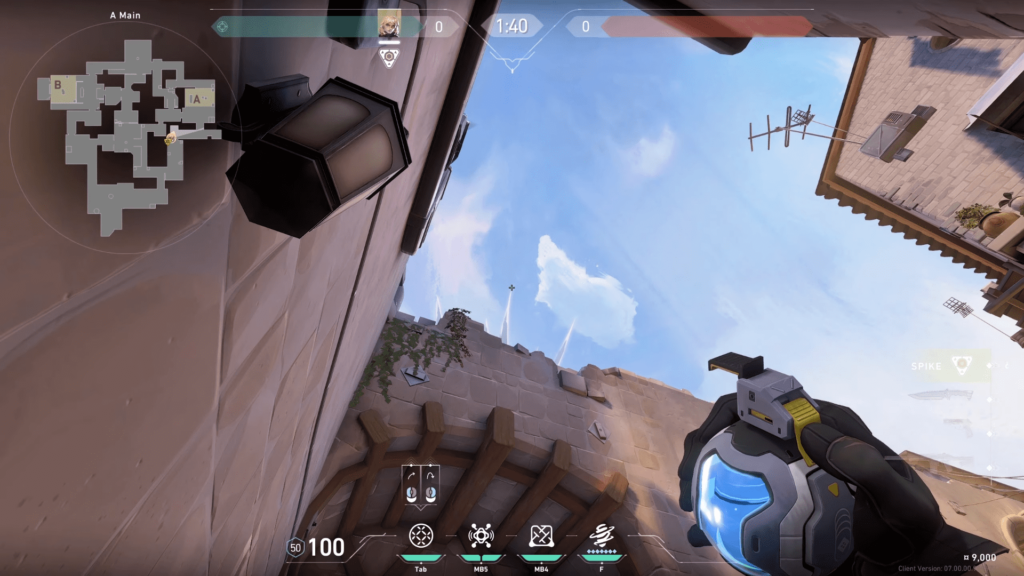
Stand in the corner at “A orb” and look towards the middle spike in the sky. Aim at the top of the spike, as shown in the picture. Then, simply click the left mouse button to throw the GravNet. It will land behind the generator. This smart placement will trap anyone hiding or trying to peek from behind the generator. This will give you a big advantage while trying to enter “A site”.
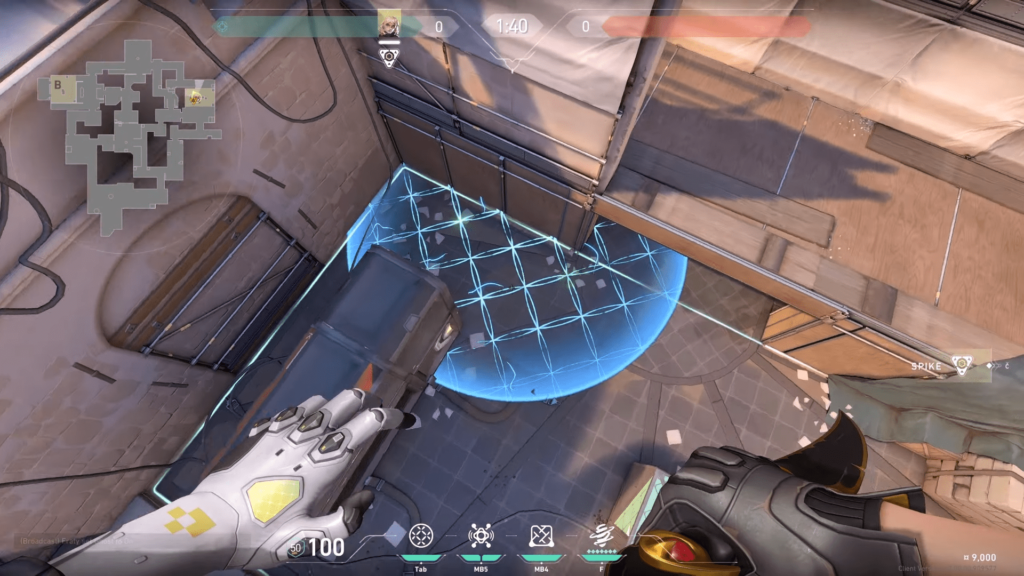
3. A main to A site Dice
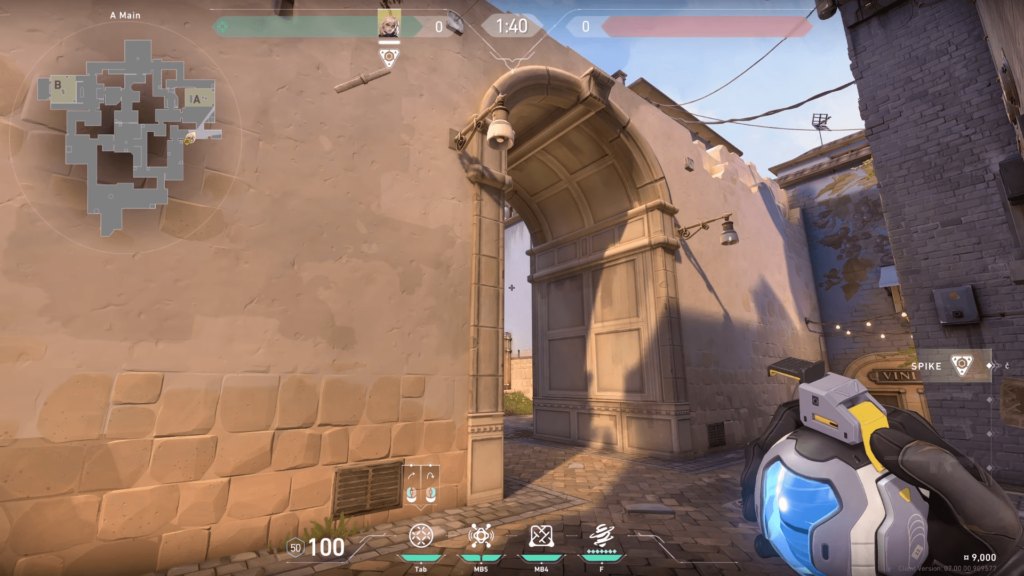
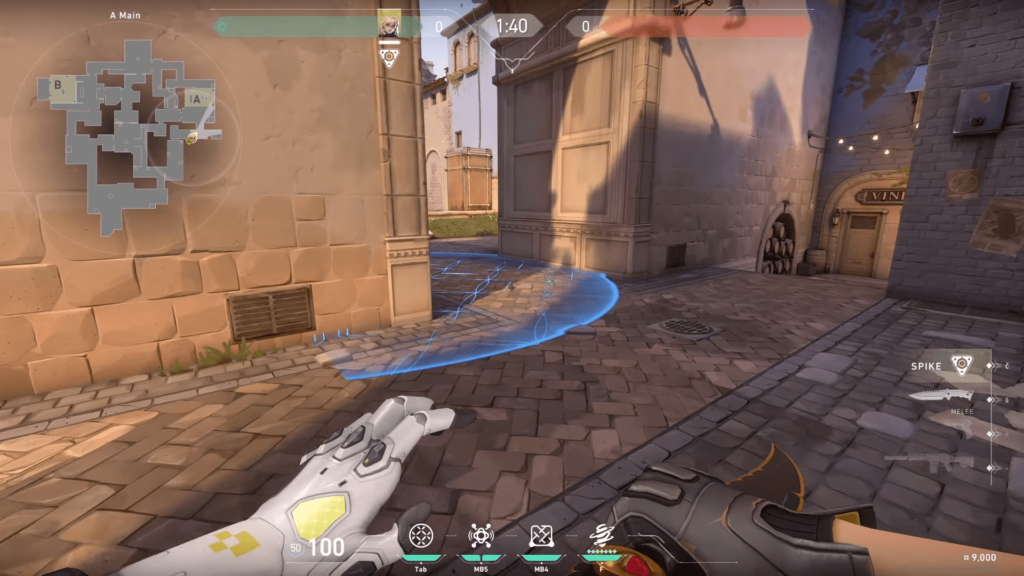
Stand at “A main” to see the left wall. Look at the picture to align the GravNet’s HUD box to the grill correctly. Aim at the top of the right wall inside the site. Move forward and jump. Then, throw the GravNet by clicking the left mouse button. It will land behind the dice, stopping anyone who tries to hide or peek from there. If you don’t want to jump, just aim a little bit higher and the GravNet will still land at the same spot. This lineup will help you enter “A site.”
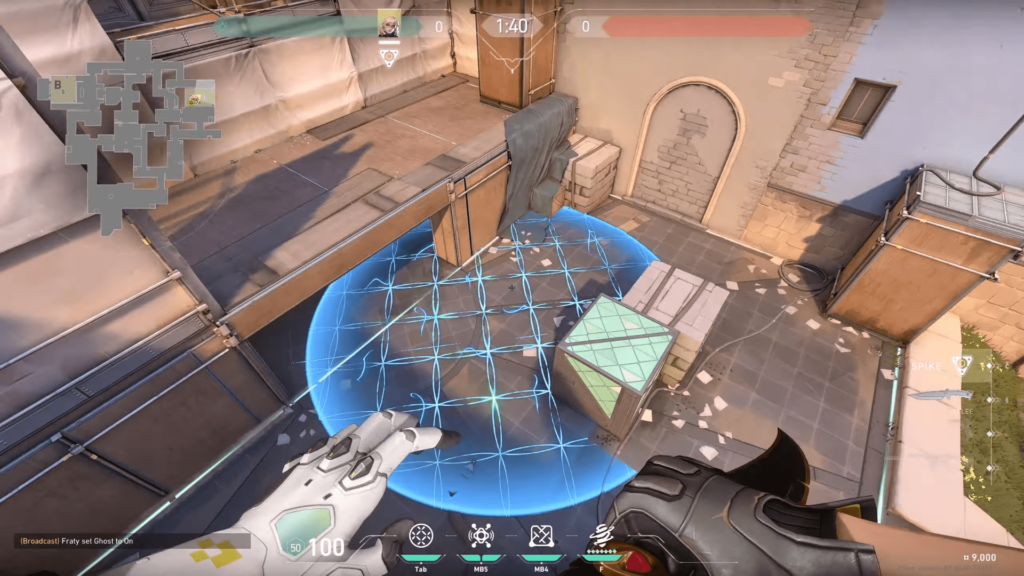
4. From Mid Link to Mid Cubby
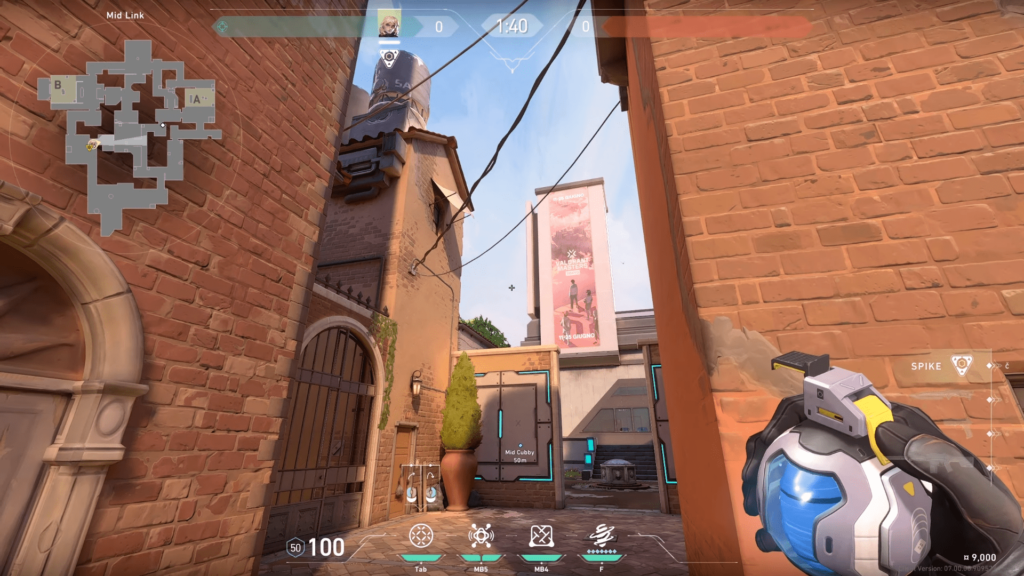
This lineup will help you to stop enemies from coming through “A short” and protect your team’s push in the middle. Stand a “Mid Link” and ping “A short” on the map. Move your crosshair up and aim at the sky (see the picture). While running forward, throw the GravNet by clicking the left mouse button. It will land exactly at “A short,” where opponents often peek early in the round. Use this lineup to proceed without worrying about opponents peeking from that direction.
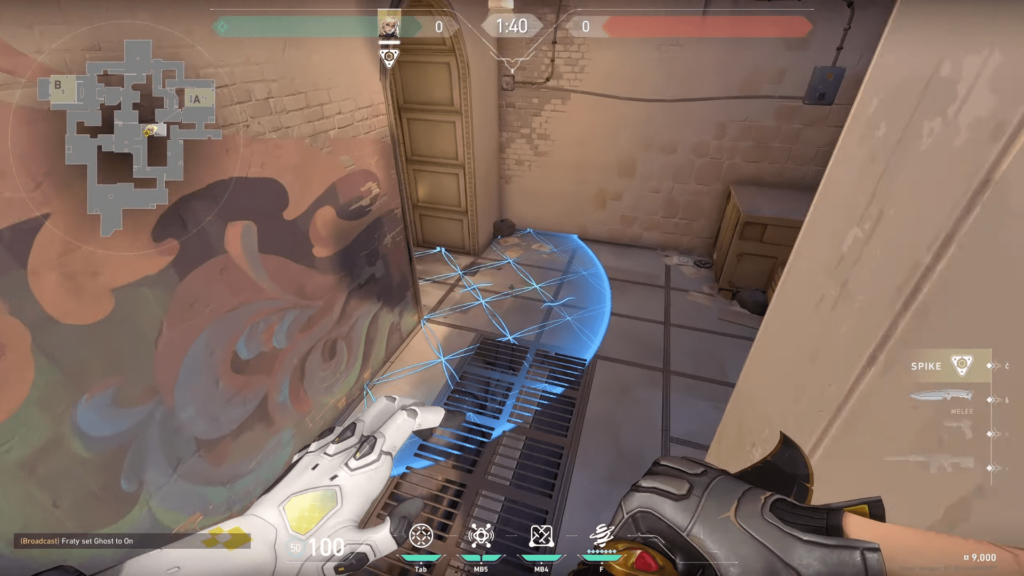
5. From B main to Lane
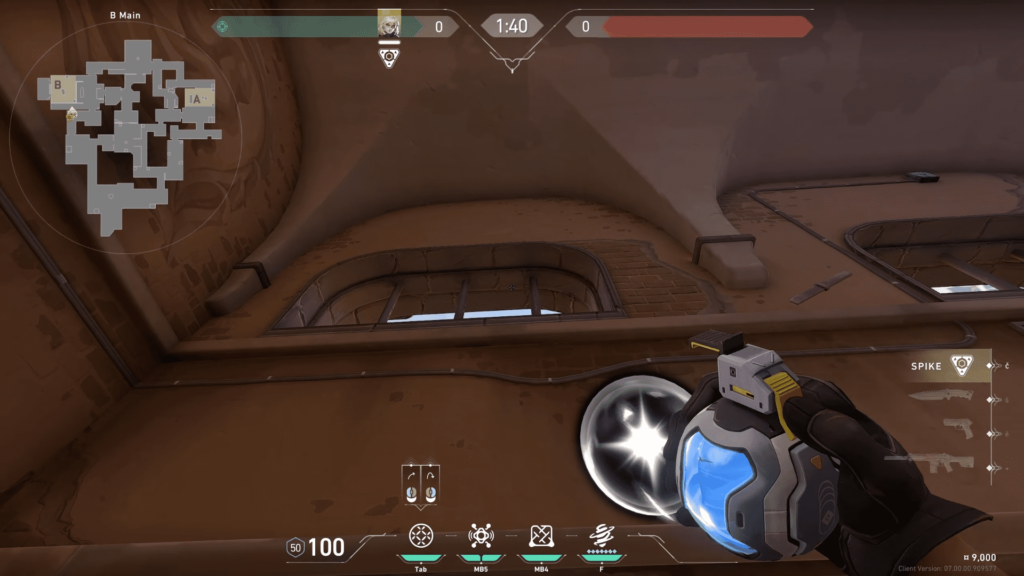
Stand in the corner by the boxes at “B orb.” Look up and line up your crosshair with the marked line (see the picture). Throw the GravNet by clicking the left mouse button, aiming towards “B lane.” This accurate throw will catch enemies who often peek from there to stop pushes from “B main.” Use this lineup to stop their advantage and take control of the area effectively.
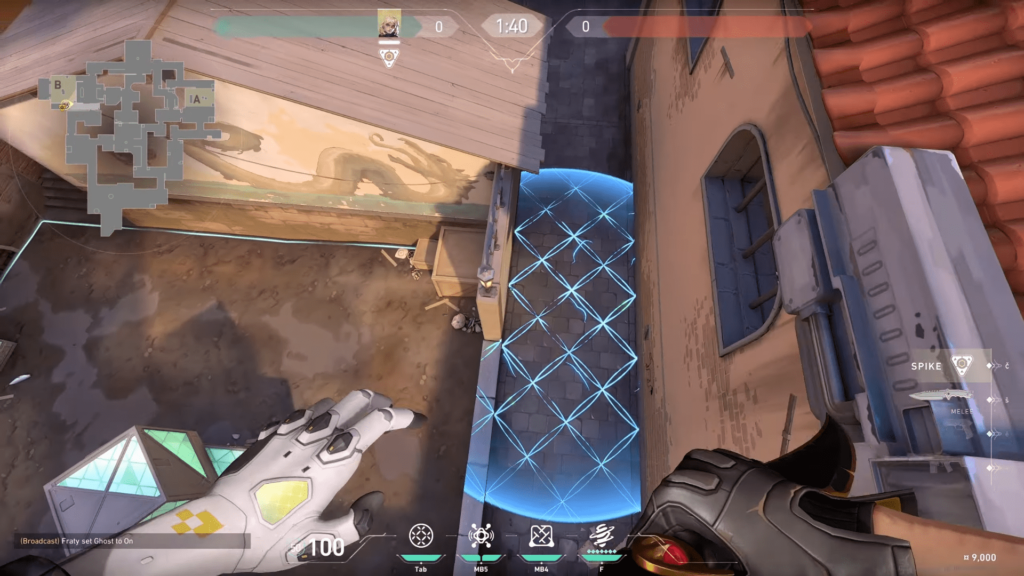
6. From B Main to Spawn
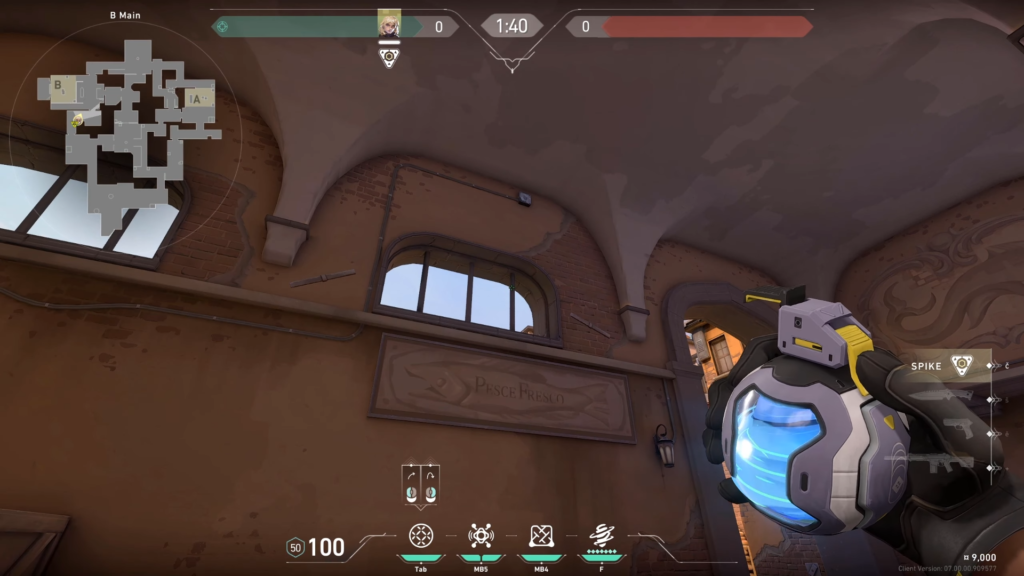
Stand next to the wall at “B main.” Aim at the top of the first bar (see the picture). Throw the GravNet by clicking the left mouse button. It will land perfectly in spawn, covering all the corners. Opponents in that area will have to stay back, allowing you to enter the site more easily. Use this lineup and try to push fast from “B lane” to gain site control.
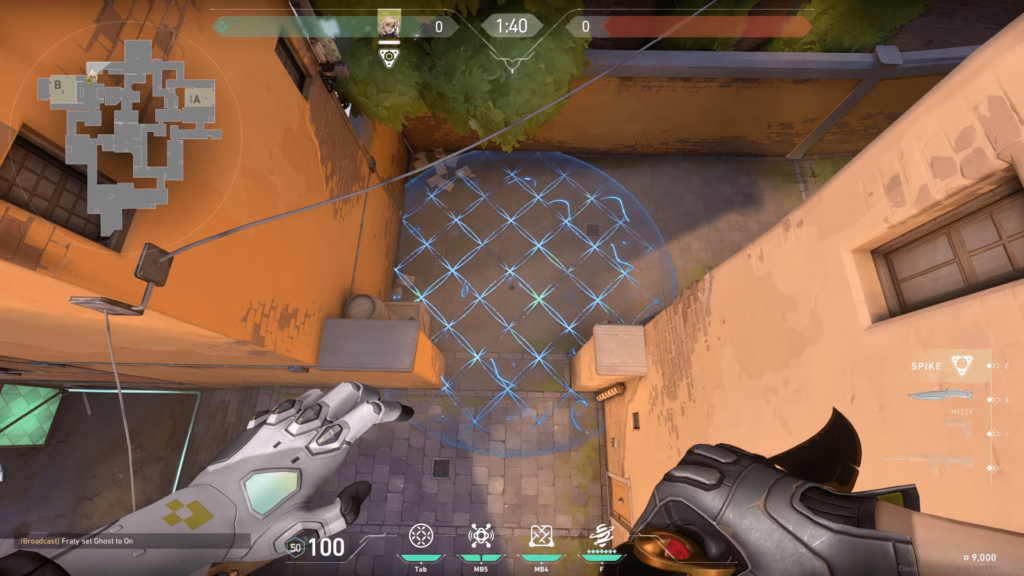
Deadlock’s GravNet Lineups for Defence on Ascent
1. From A Heaven to Switch
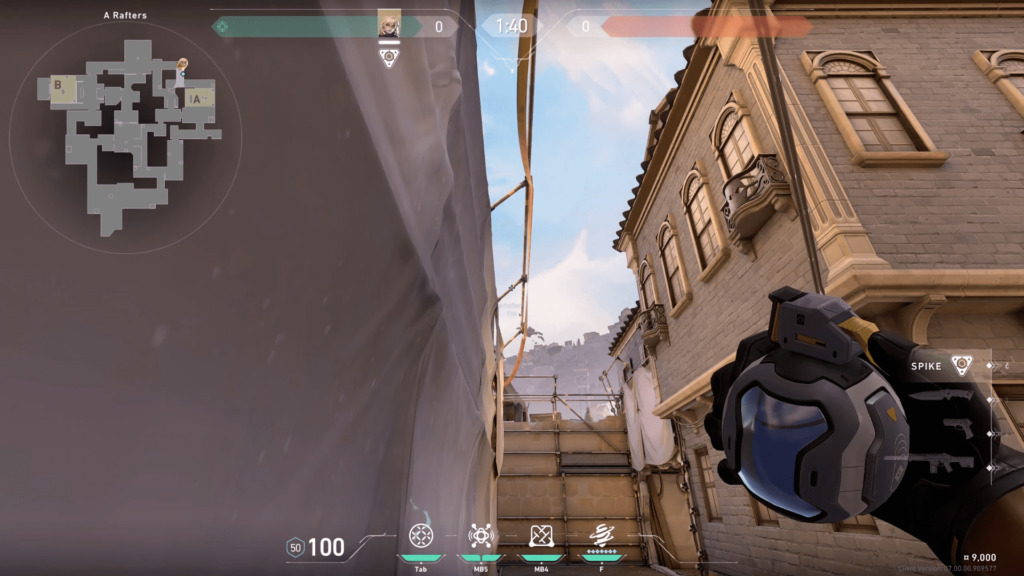
Stand in the corner at the stairs of “A heaven.” Look up and aim at the yellow part of the second line (see the picture). Throw the GravNet by clicking the left mouse button. It will land accurately at the switch, covering both corners where opponents often stay. This will surprise them, and your teammates can push and use this advantage to take control of the area.
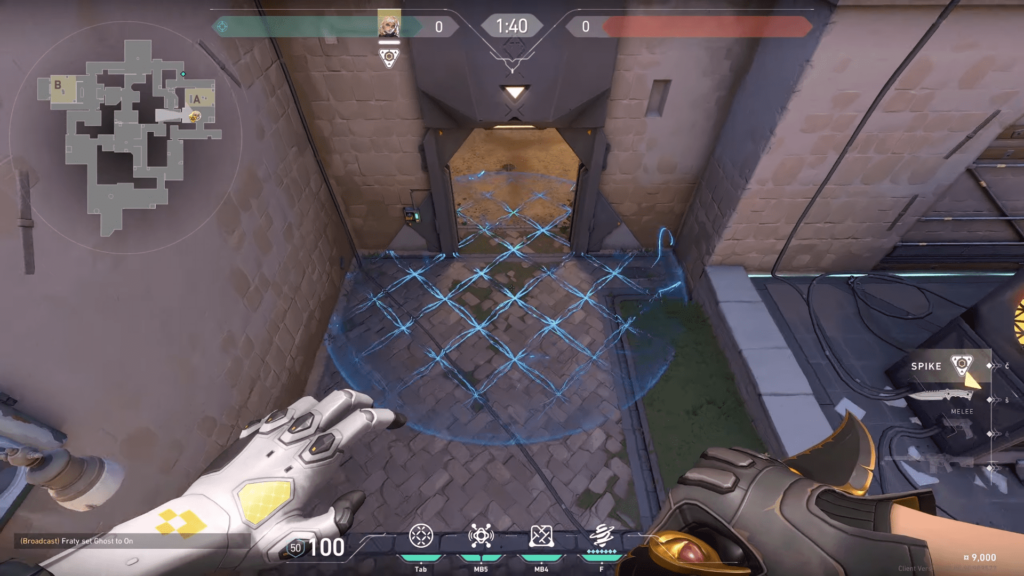
2. From A garden to An Entrance
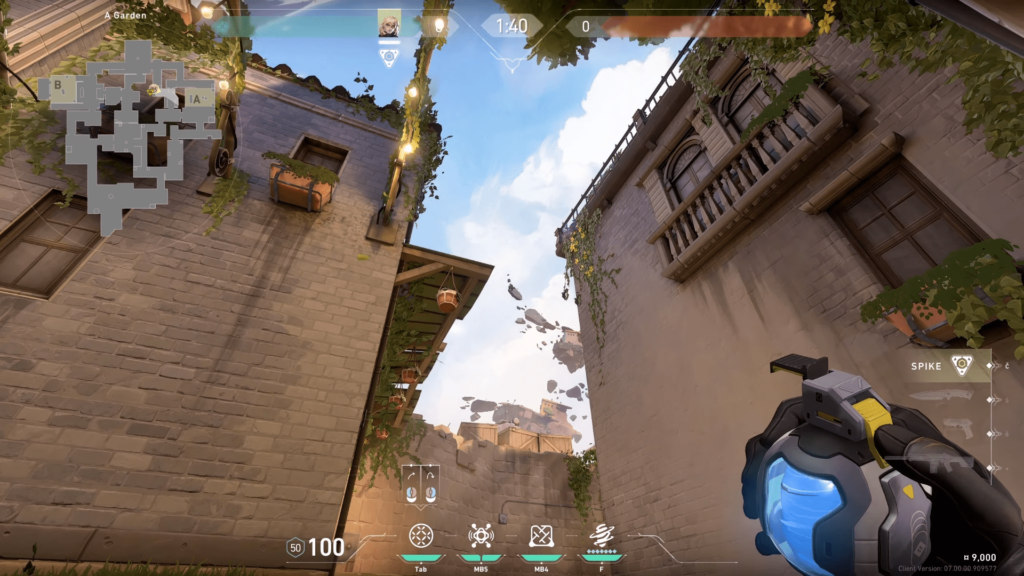
To stop an enemy push towards “A site,” stand next to the wall at “A Garden.” Aim at the rocks in the sky (see the picture). While moving forward, throw the GravNet by clicking the left mouse button. This smart throw will cover the entrance and catch any opponents trying to enter the site. Use this lineup to help your teammates who are already on the site.
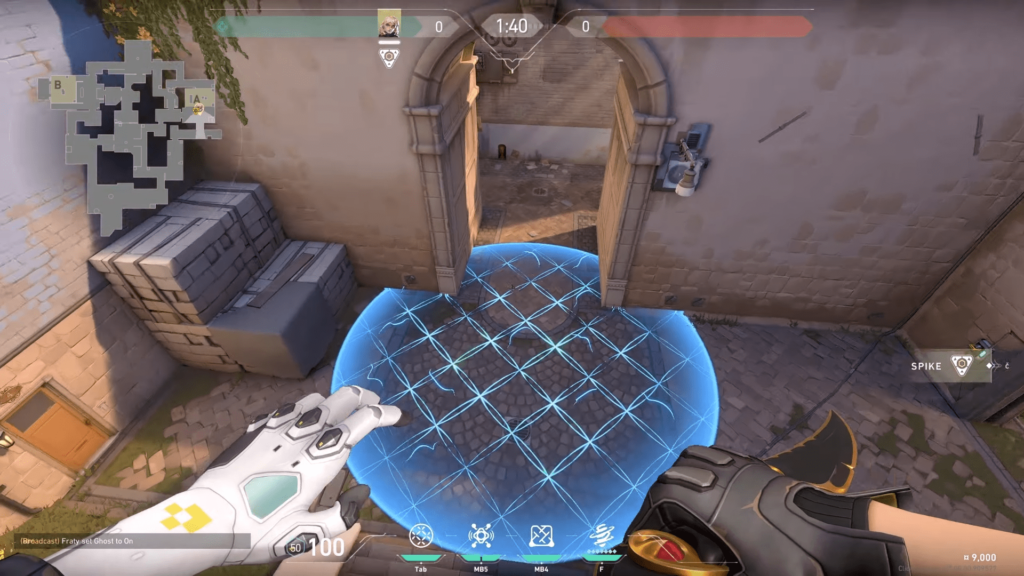
3. From B Lane to B main
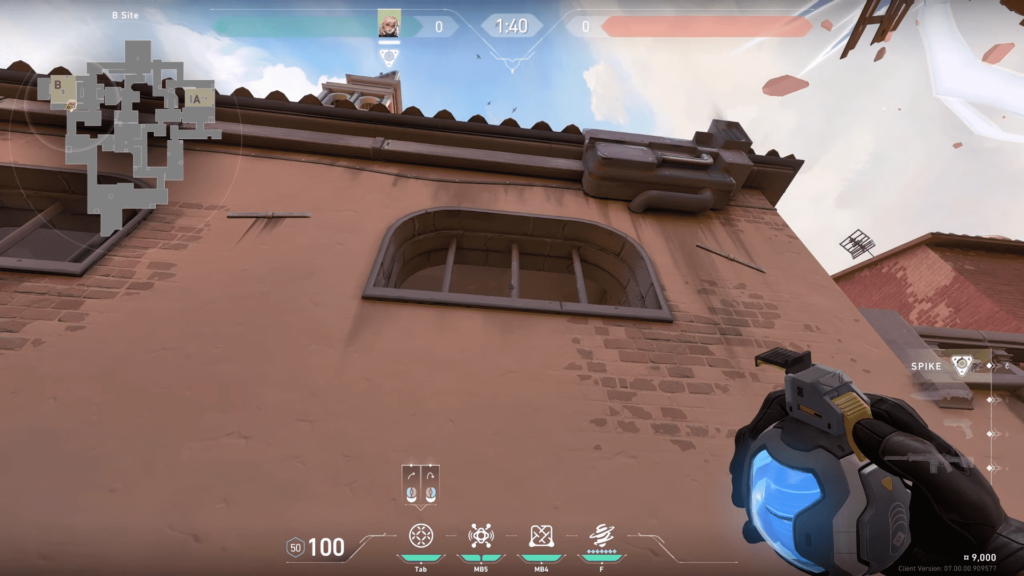
To stop enemy pushes at “B main,” stand at “B lane” and aim upwards (see the picture). Throw the GravNet by clicking the left mouse button, making it bounce off the roof. It will land in B main, covering a large area. This strategic lineup will provide good coverage, stopping opponents from moving forward and giving your team an advantage. You can combine this with an Odin spam through the wall which will get you some easy kills.

4. CT Spawn to B Boathouse
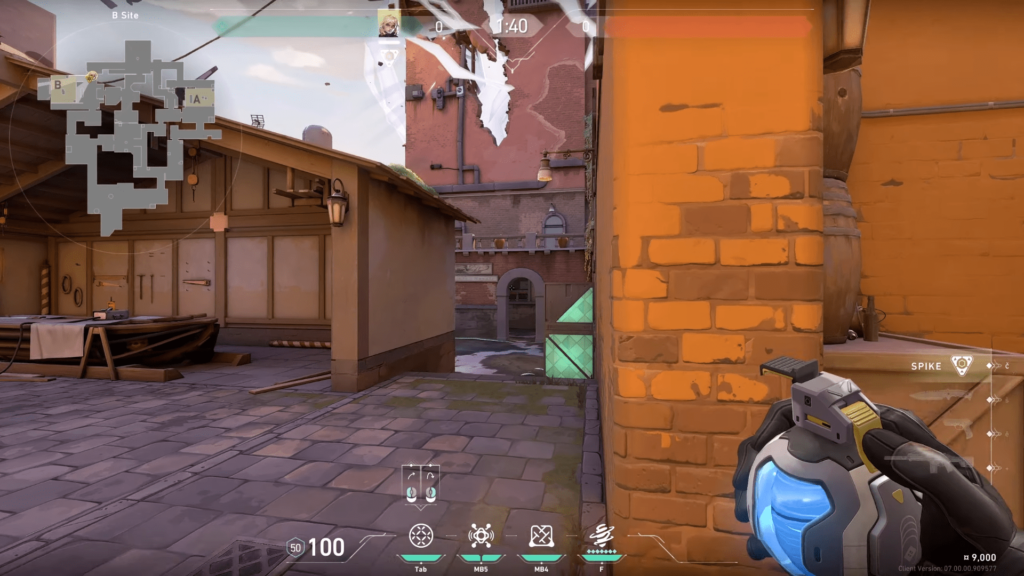
Throw the GravNet by clicking the left mouse button. Aim at the right side of the boathouse. This smart placement lets you enter the site without worrying about opponents peeking from that direction. Instead, focus on checking the left side for any opponents when you enter the site. Use this lineup to efficiently retake control of “B site.”
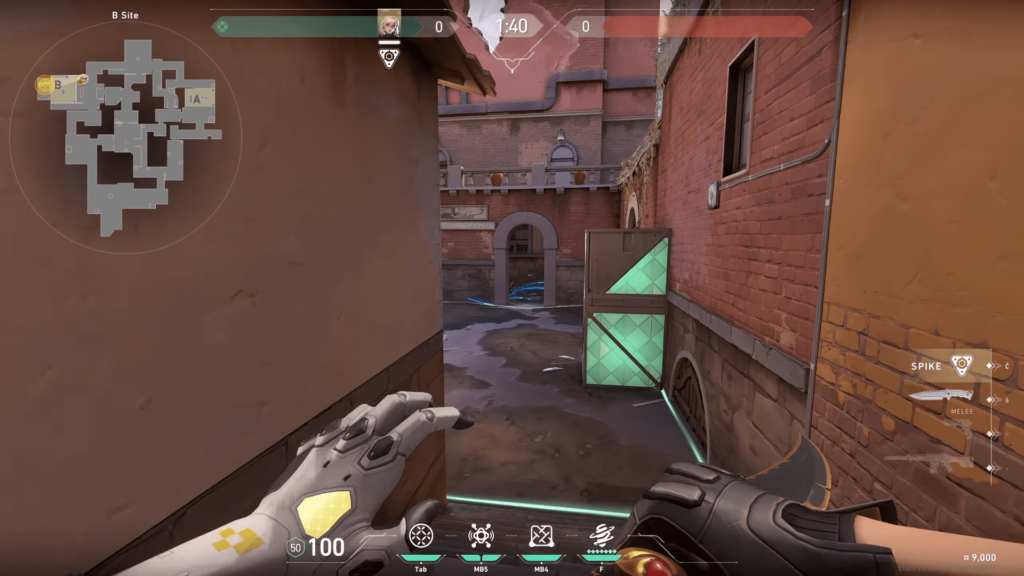
Deadlock’s Barrier Mesh Lineups on Ascent
1. From A Heaven to A Entrance
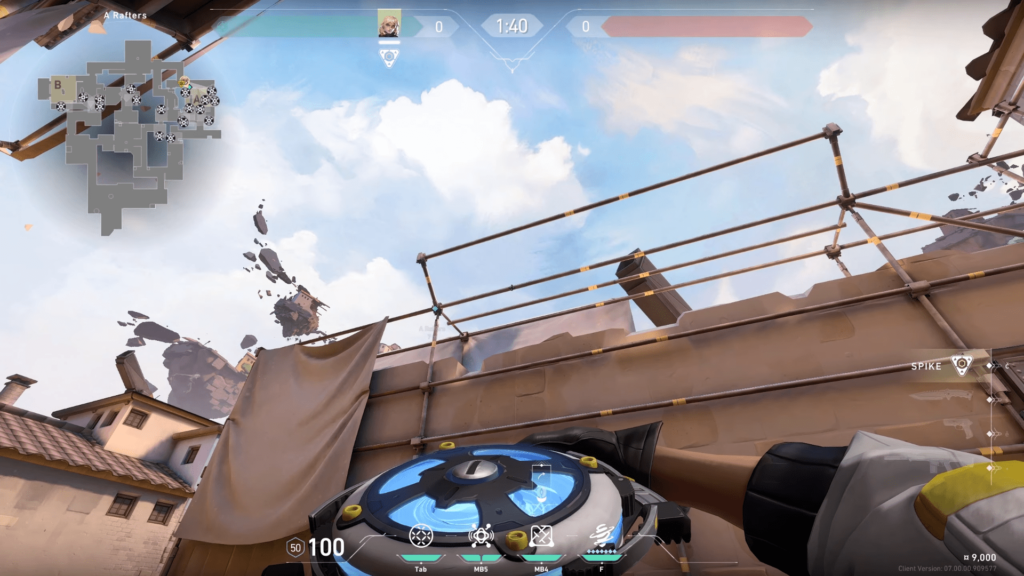
Stand next to the wall at “A Heaven.” Aim at the middle of the line above (see the picture). Jump and throw the Barrier Mesh by clicking the left mouse button. It will land accurately at the A entrance, stopping anyone trying to push through. Use this lineup to create a barrier and prevent opponents from moving forward. This helps your team maintain control over the site.
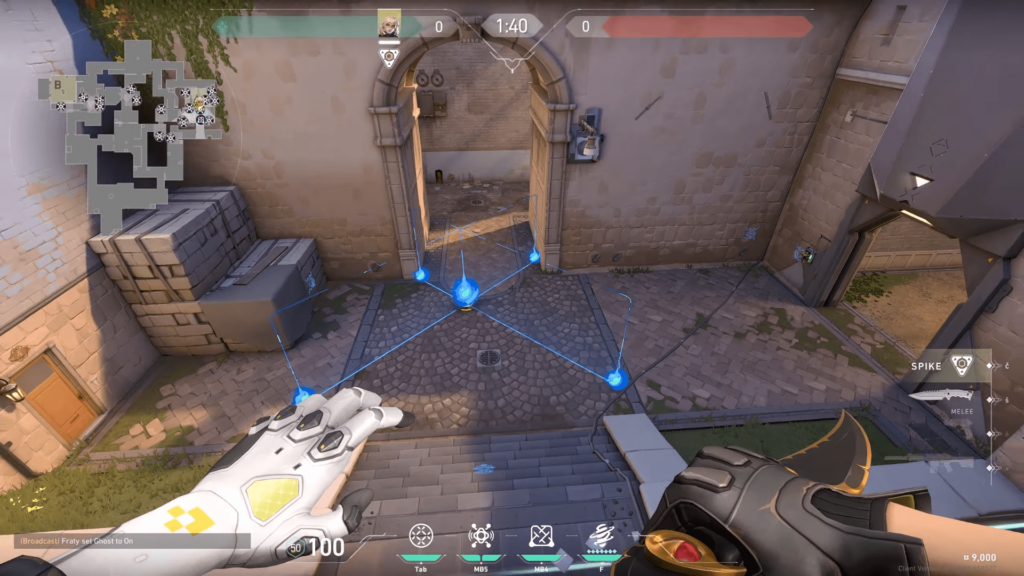
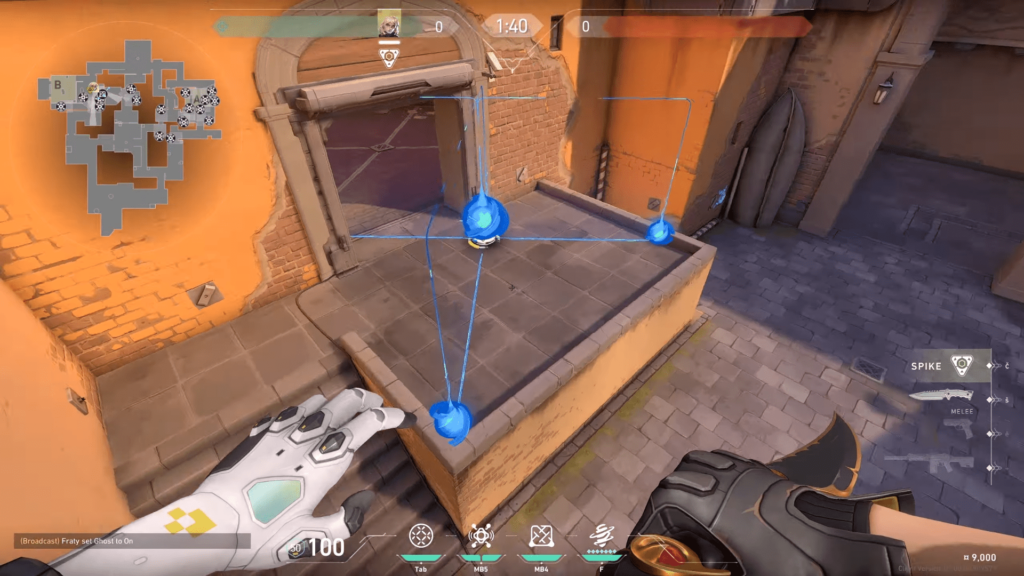
2. B Main to Market
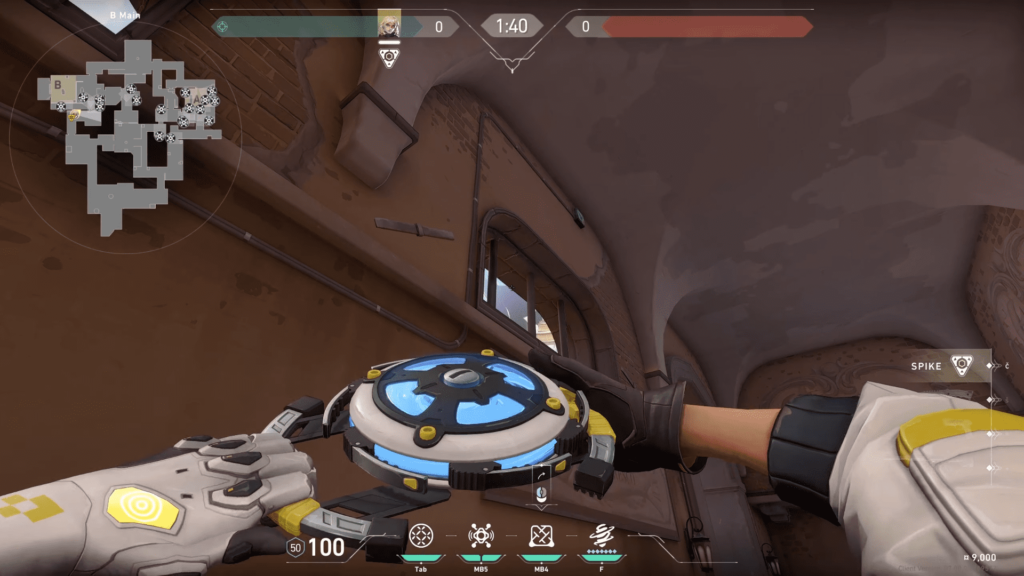
Stand on top of the small box next to the big one at “B orb.” Aim at the middle of the two bars above (see the picture). Throw the barrier mesh by clicking the left mouse button. This smart throw will block anyone trying to push from the market. For even more protection, you can use a smoke along with this lineup. This setup creates a strong defense and improves your team’s chances of successfully entering the B site.
To sum it up, Deadlock’s GravNet and Barrier Mesh abilities greatly improve control and tactical advantage on Valorant’s Ascent map. Whether attacking or defending, Deadlock’s lineups provide precise and strategic placements to disrupt enemy movements, surprise opponents, and secure important areas. Mastering these lineups allows players to dominate the battlefield, control the flow of combat, and introduce new strategies to the evolving game.
Without a doubt, Deadlock is a valuable asset, offering flexibility and disruptive abilities that add depth to the gameplay experience on the Ascent map in Valorant. It is also perfect to mix things up and move past Killjoy even though Killjoy is still dominant on Ascent in Valorant
In case you missed it:
- Will NBA 2K24 allow Cross-play function?
- Revenant Esports unveils its star-studded roster in collaboration with Gigabyte Aorus for Skyesports Masters


